「PaPaPointアプリ【計画編】」で宣言したとおりアウトプットしていくぞい。
プロジェクトの準備
1. Create React App
プロジェクト生成
CRAでtemplateオプションを付けてTypeScriptの環境を作ってもらいます。
$ npx create-react-app papa-point --template typescript2. GitHubでリポジトリ作成
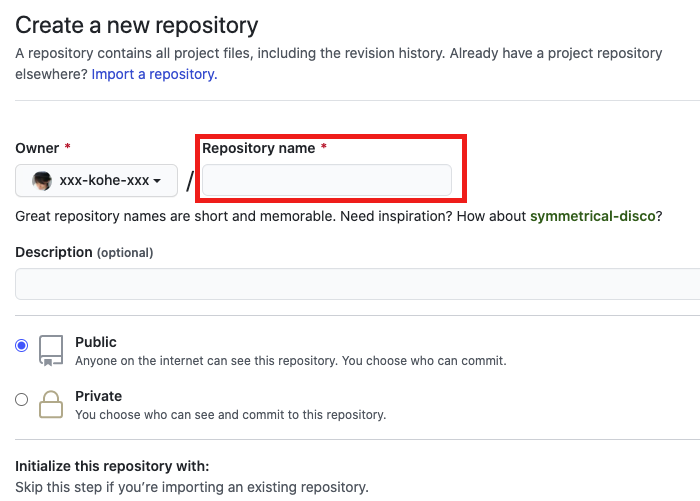
GitHub へアクセス
右上のプラスボタンからNew Repositoryを選択 or サイドバーにあるNewボタンをクリック

リポジトリ名を入力する
アウトプットだしPublicでいいかな
Public → 誰からでもリポジトリが見える
Private → 自分(と許可した人)しかリポジトリは見えない
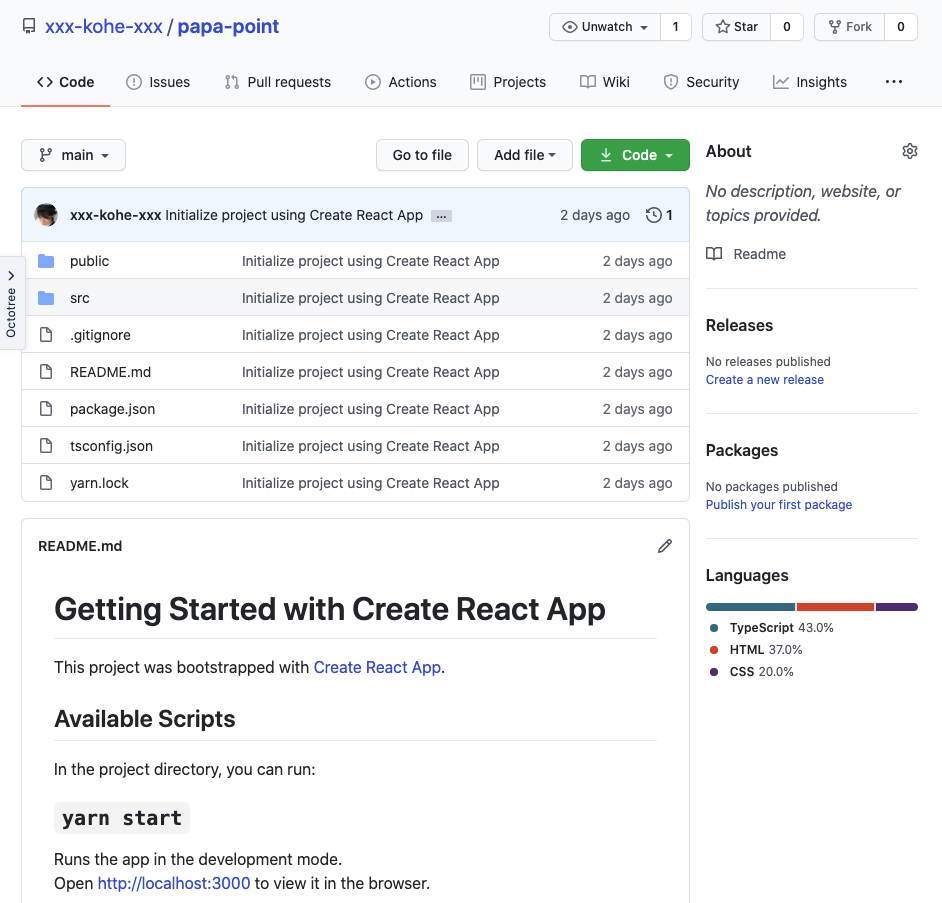
3. GitHubへプッシュ
masterブランチじゃなくてmainブランチになりましたね。
以下のコマンドでGitHubへプッシュ
$ git remote add origin https://github.com/xxx-kohe-xxx/papa-point.git
$ git branch -M main
$ git push -u origin main
プッシュできましたー
各種設定
1. tsconfig.jsonの設定
{
  "compilerOptions": {
    "target": "es5",
    "lib": [
      "dom",
      "dom.iterable",
      "esnext"
    ],
    "allowJs": true,
    "skipLibCheck": true,
    "esModuleInterop": true,
    "allowSyntheticDefaultImports": true,
    "strict": true,
    "forceConsistentCasingInFileNames": true,
    "noFallthroughCasesInSwitch": true,
    "module": "esnext",
    "moduleResolution": "node",
    "resolveJsonModule": true,
    "isolatedModules": true,
    "noEmit": true,
    "jsx": "react",
    "baseUrl": "src", // インポートを絶対パスで書ける    "incremental": true // 再コンパイルが早くなる  },
  "include": [
    "src"
  ],
  "exclude": [ // コンパイルの除外ディレクトリを設定    "node_modules", "build", "scripts", "functions"  ]}
2. LintとPrettier導入
コマンドを実行して必要なパッケージをインストールしていく
# stylelintとPrettierインストール
$ yarn add -D stylelint prettier
# ESLintのプラグイン(ルール)のインストール
$ yarn add -D eslint-plugin-react eslint-plugin-react-hooks eslint-plugin-import eslint-plugin-jest eslint-plugin-prefer-arrow eslint-plugin-jsx-a11y eslint-plugin-prettier eslint-config-prettier eslint-config-airbnb
# TypeScript用のパーサ&プラグイン
$ yarn add -D @typescript-eslint/parser @typescript-eslint/eslint-plugin
# stylelint系パッケージ
$ yarn add -D stylelint-config-prettier stylelint-config-standard stylelint-order stylelint-config-styled-components stylelint-processor-styled-components
# Prettierとstylelintの連携
$ yarn add -D prettier-stylelint
# @typesパッケージを自動で追加してくれるパッケージ
$ npm install -g typesync
# シェル再起動
$ exec $SHELL -l
# 必要なTypeScriptの型ファイル自動追加
$ typesync
$ yarn下記ファイルはこちらからコピペ
- .eslintrc.js
- .eslintignore
- .gitignore
- .prettierrc
- stylelint.config.js
3. npm-scriptの設定
Commit前にもESLintが自動実行されるようにする
$ yarn add -D husky lint-stagedpackage.jsonを編集する
  "scripts": {
    "start": "react-scripts start",
    "build": "react-scripts build",
    "test": "react-scripts test",
    "eject": "react-scripts eject",
    "lint": "eslint 'src/**/*.{js,jsx,ts,tsx}'; stylelint 'src/**/*.{css,jsx,tsx}'; cd functions/ && eslint 'src/**/*.{js,ts}'",    "lint:fix": "eslint --fix 'src/**/*.{js,jsx,ts,tsx}'; stylelint --fix 'src/**/*.{css,jsx,tsx}'; cd functions/ && eslint --fix 'src/**/*.{js,ts}'",    "precommit": "lint-staged"  },
  ︙
  ︙
  "husky": {    "hooks": {      "pre-commit": "lint-staged"    }  },  "lint-staged": {    "src/**/*.{js,jsx,ts,tsx}": [      "eslint --fix",      "git add"    ],    "src/**/*.{css,jsx,tsx}": [      "stylelint --fix",      "git add"    ],    "functions/src/**/*.{js,ts}": [      "cd functions/ && eslint --fix",      "git add"    ]  }
【参照元】りあクト! Firebaseで始めるサーバーレスReact開発
まとめ
設定周りの知見がほぼ皆無なのでまずは参考書通りにやってみる。
使ってみなきゃわかんないので愚直にマネしてやってみます。
環境構築系ってハマるとほんと時間が溶けちゃいますよね。
他の作業と違って何回もやる作業じゃないしなかなか身につかない。。。
それではまた明日。